Pages

Thursday, August 28, 2014

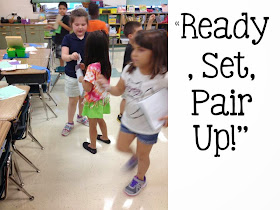
I-PAIR YOU Up! A clever way to pair students up!

Picture it.

Present day classroom and you are getting ready for a partner activity! You announce that you will be putting kids into pairs or partners.


Guilty!!! 


You know it happens because chances are you do it, too, when in faculty meetings you are asked to pair up with someone! You probably pair up with someone from your grade level or a friend! 

We are all guilty of it! Our students are no different! Today I wanted to share with you a few easy, quick ways that I pair students up. No tears and no hassle. 


This one simply uses a deck of cards!! No printing, no nothing! 


For this particular pair up, we did some brainstorming on how to problem solve for Ormie the Pig! Have you seen Ormie? It's a cute little video that I use for science on finding a problem, creating a hypothesis, and creating a design. Here is a the video if you want to check it out! The kids LOVE it!!


Look at their clever drawings! 


Maybe you are a techie like me! I also use these two apps on my phone:

Pik me app: 
Cost: Free
I love this app for grouping kids randomly. You can choose how many students for each group. So, if I want 4 kids in each group, It will already group my kids for me. 
The only downside is that it can be a bit confusing to use in regards to inputting names and such and choosing which feature you want. You will have to play around with it a bit. 
You can search for it in the app store. 


Name Selector from Kagan
Cost: 2.99
This is a great app for choosing individual students, table names, anything! It's a little easier to use than the Pik Me app. 
It's available in the app store. 


If you'd like to download the cards for I-PAIR YOU up, click on the picture below to download your FREEBIE! Happy Pairing!


There are three versions (enough for 20 students):


Saturday, August 16, 2014

Classroom Reveal!


Yesterday was my 12th Meet the Teacher! I must say it was the hottest one I ever had. 

HOT. As in temperature,

We had no AC in the whole school!!

Yeah... I know! LOL! You cannot control these things and we did the best we could! 

I was so excited to meet my new babies this year in my new classroom theme: Under the Sea! I tried to create an underwater theme in my room without breaking my budget (which we all know as teacher is very hard to do!). Luckily I was able to reuse some of the things I already had in my room! It came out fabulous! I could not be any happier! 

My bulletin board outside my room. I do this board every year. Nothing fancy here! Just some bulletin board paper and imagination! I really love learning about oceans-- in fact it's a personal favourite of mine! It's a theme I usually do at the end of the year but since it's my theme this year, it will be one I will incorporate all year! 


Who knew these would have multiple uses??


I wanted my kids to feel like they were walking through seaweed so I just took leftover grass skirt material (I found them at the Dollar Tree! So easy to cut and made great seaweed.)


View from my doorway. Again, I cut up the grass skirts into strips and hung them from my ceiling. I realize that some of you may not be able to hang stuff from the ceiling. So sorry! 


My math focus board. I put some of the math strategy posters from my Math Strategies Poster pack. I do not intend to display all of them at once. I will change them as we focus on one or two strategies at a time but for now, I wanted to put "something" up! 

A view of my ABC line! I couldn't wait to put this up! It's part of my Ocean Decor set!! It's a combo of ocean and beach! Just brightens up my room! 


Number line and class rules! They are eye level with the kids when they sit on my carpet and serves as a great reminder for them! You can download my Reef Rules Posters for free here.

My class library-- "School of Readers". These fish are from Creative Teaching Press and each have my student's names on them. Too cute!!  I bought my net from Oriental Trading. I've had it for so long-- there are a few tears but I think that makes it authentic! 


Reading Counts Board. I laminated the point cards so that I just have to write on them and done! No more cut outs and moving pieces! You can download them for free here

Reading Beach Library

Isn't this fabulous?? I found the tutorial from Party City. It was super easy to do once I got all the pieces I needed. Several hot glue mishaps (may have burned off my fingerprints, too! ha!) and I love my masterpiece! 

A close up of my blow fish! Just took some lanterns and cut some fish parts. Again, easy and reused things I already had! 

I love my manta ray! You can't see it but it's hanging over my desk. I took some black foam board and seriously, just free handed it. I know-- I'm like that. I work off lines of symmetry and drew what it would look like (first on scrap paper and cut it out as a sample) and then I cut my ray one half at a time from the foam board. That's why you see some tape on his tail (that, and my little one broke his tail! LOL!). After I cut them out, I taped them together. I had intended for the wings to be uplifted once hung on my ceiling but didn't work out that way. I still love it! 

Finally, my team this year! I love these girls! I come to school every day knowing that I have true besties that work with me. They are like my sisters and I am so blessed to be with them! Could not ask for a better team to teach with. I love them! 


So, that is my looonnnggg classroom reveal! Hope you gathered some ideas for your class! School starts Monday for me! 

Have a great week! 


Tuesday, August 12, 2014

Back to School YouTube Party and Giveaway!!!


Seriously!! So FREAKING EXCITED! I am SERIOUSLY excited (and a little bit nervous) about this post. That would be my face!!


You see, my blogging friends and I at the Primary Chalkboard wanted to do something BIG for back to school for you.BIG I'm talking, BIG.We decided to throw a party. Here is a hint.


It's a YouTube Party! We are here to share lots of tips, tricks, ideas that would greatly help you this coming school year! Tips for DIY, decorating, organizing, and just good teaching practices to make this year a truly amazing one.

What about a giveaway, you ask?? Why yes! It's Huge! Major! You want to win kind of giveaway! 

We are going to hook you up with one of the following:

$100 GC to Amazon
$100 GC TpT 
Michael Kors tote

Personally, I'd love to win all 3-- too bad I can't! But YOU CAN! 

How? 

We have a series of videos for you each day of our giveaway. At the end of each video, we will give you a secret word! Each word is unique to us so you will need to write it all down. Once you watch  all the videos , enter the secret word from each tip to get an extra entry on our RaffleCopter.

So EASY! Get a cup of coffee (adult beverage, whatever you like!), watch, think about our amazing ideas (they are great!!!) and how they work for your classroom. Done!!  And look, we even made a check-list for you!


We will be linking up 5 new videos every day this week... so you can come back, watch, and enter every day!


I'm excited to share my video with you! 


So, now that you've watched, don't forget to head over to the Primary Chalkboard to watch more tip clips and gain more entries to the giveaway! You can come back every day this week to watch more fabulous videos and gain more entries! 


a Rafflecopter giveaway


Exciting!!! Good Luck!!